

BMW 3-Series and 4-Series Forum (F30 / F32) | F30POST
>
H&R Sport Springs Installation Questions

| 02-11-2014, 11:43 PM | #23 | |
|
Lieutenant Colonel
 230
Rep 1,554
Posts |
Quote:
I would think dropping the lower part would be much easier than trying to take out the spring still in the well. Just my opinion. |
|
|
Appreciate
0
|
| 02-12-2014, 06:58 AM | #24 |
|
Private First Class
 9
Rep 149
Posts |
when i did my install. I was able to remove the strut without compressing springs. I do I have 328i sport with dynamic struts. I was able to loosed everything then push down on rotor with foot to get enough clearance to swing out. I did have a helper guiding the strut out while i pushed down with my foot on rotor. This was easy. Driver side I did remove steering tie rod end. On passenger side I decided to use a little more force and push down on rotor with steering tie rod still in place. I think the drivers side can be removed as well with out removing steering.
|
|
Appreciate
0
|
| 02-12-2014, 08:55 AM | #25 | |
|
Lieutenant
 
164
Rep 573
Posts
Drives: 2013 F30 335i 8SA M-Adaptive
Join Date: Oct 2012
Location: Dallas, Tx (Frisco)
|
Quote:
I just put the spring compressor on and compressed the spring in the well, allowing me to compress the shock shrinking the entire assembly then swing it out of the well I'll film it when I put the camber plates in - yall can tell show me the easier way after |
|
|
Appreciate
0
|
| 02-12-2014, 08:59 AM | #26 | |
|
Lieutenant Colonel
230
Rep 1,554
Posts |
Quote:
|
|
|
Appreciate
0
|
| 02-12-2014, 09:05 AM | #27 | |
|
Lieutenant
164
Rep 573
Posts
Drives: 2013 F30 335i 8SA M-Adaptive
Join Date: Oct 2012
Location: Dallas, Tx (Frisco)
|
Quote:
 |
|
|
Appreciate
0
|
| 02-12-2014, 09:28 AM | #28 |
|
Lieutenant
164
Rep 573
Posts
Drives: 2013 F30 335i 8SA M-Adaptive
Join Date: Oct 2012
Location: Dallas, Tx (Frisco)
|
PS I'm going to put pictures, unpacking, review etc here http://www.f30post.com/forums/showthread.php?t=945419 when I get them in
|
|
Appreciate
0
|
| 02-12-2014, 02:37 PM | #29 | |
|
Lieutenant Colonel
230
Rep 1,554
Posts |
Quote:
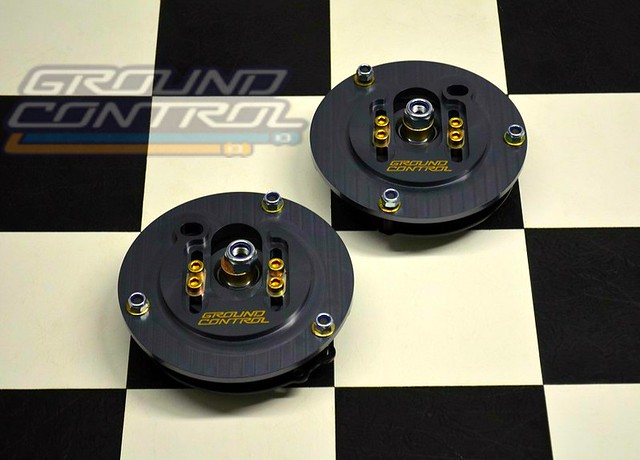
Didn't think Ground Control mess with BMWs much. I used them on my Hondas back in the day. Sweet. |
|
|
Appreciate
0
|
| 04-12-2014, 01:49 PM | #30 |
|
First Lieutenant
58
Rep 376
Posts |
The install is pretty simple. Just did it myself. Had there been a DIY or something ahead of time, I could of done this in an hour. Just figuring it out myself only took about 3hrs. It is basically just as utenigma said, however I wouldn't recommend removing eccentric bolt as it is not necessary and will mess with alignment. For the rear, you just need to remove (in addition to the sway bar link) the lower shock bolt an the large (21mm) bolt right next to it. That will allow you to lower the assembly enough to remove the springs. Anyhow, here are some before and after pics (of course with a wheel swap as well).
  |
|
Appreciate
0
|
| 04-22-2014, 04:25 PM | #31 | |
|
Private First Class
4
Rep 118
Posts |
Quote:
 Subscribing for a lot of good info! Thanks! |
|
|
Appreciate
0
|
| 04-30-2014, 01:02 PM | #32 |
|
Registered
0
Rep 1
Posts |
Does anyone know the size of the e-torx bolts holding the top of the rear shocks? Also, what's everyone using for the special through socket and allen wrench combo (possibly an O2 sensor socket)?
I appreciate everyone's help! |
|
Appreciate
0
|
| 05-03-2014, 11:04 PM | #33 | |
|
Prince of Zamunda
9
Rep 310
Posts |
I was able to use this thread as an impromptu DIY to install my springs today. However it took me longer than I'd like because it wasn't a real DIY and I wasn't aware of some tools I was missing i.e. pass-through sockets/wrench. The front is exponentially more difficult and time consuming than the rear. The rears took 20 min each, and the front took hours, mostly because of compressing the spring, then compressing again enough so the top hat didn't blow off in my face when taking it off.
Quote:
|
|
|
Appreciate
0
|
| 05-04-2014, 09:13 AM | #34 | |
|
Captain
252
Rep 674
Posts |
Quote:
1. You need some sort of special socket to loosen/remove the nut holding on the hat of the strut 2. The sway bar linkage is a similar process to install as the hat on the strut as you need to hold the bolt in place with an allen key and then tighten with a socket/wrench. This was a huge pain in the ass as I can banged up a couple of the starting threads and it took forever to fix them and get the nut all the way back on. The 2nd front only took about 45 minutes. The first back took me almost an hour and the 2nd back only took 15 minutes (really easy once you know how to do it). Also, I don't really agree with the step by step instructions on the previous page, especially for the rear as removing the eccentric bolt will through your alignment out of whack. If your going to get an alignment following the installation maybe this will be easier but I chose not to and therefore left the eccentric bolt untouched. These were the steps I took for my 2013 328i M Sport (non-adaptive sport suspension). Front: 1. Jack up car & remove wheel 2. Loosen nut on top of strut hat (do not remove, only break it loose) 3. Remove sway bar linkage bolt from strut and make sure you have some slack on your brake lines and any wiring. 4. Remove 4 bolts that hold strut in the engine bay (place jack underneath lower control arm to support the weight of the hub) 5. Lower hub down and using a little bit of force, slide top part of strut out of the wheel well (be careful of fender). 6. Compress spring using 2 spring compressors as close to 180 degrees apart as possible. I was only able to grab 2 coils on one side and 3 on the other side of the spring. But after tightening these down all the way the spring was compressed enough to not be a safety hazard. I put on my hockey helmet and cage just to be safe tho, haha. 7. Carefully remove the nut the holds strut hat on. 8. Reverse steps to install Rear: 1. Jack up car & remove wheel 2. Remove 18mm bolt holding the strut to the lower control arm (you'll need a torx socket to hold the other side, although I don't remember the size) 3. Remove the big 21mm bolt holding the lower control arm to the hub. 4. Pull down on lower control arm and remove/install spring 5. Use a jack to lift the control arm back into place (this is a bit tricky as you need to align all of the holes again to get the bolts through. Id recommend installing the big 21mm first. I used a screw driver and hammer to help align and get it through and it wasn't too bad). 6. Reinstall both the 21mm and 18mm nuts/bolts/wheel. Done Keep in mind these steps may vary ever so slightly across different models (335i, X-Drive, M Adaptive suspension, Non-sport suspension, etc.). Hope this post is able to help save a few people some time and frustration as if you have the instructions correct prior to the install you should be able to do this in 3 hours by yourself without a lift or air tools (probably half the time with). Last edited by TurboM; 05-04-2014 at 11:01 AM.. |
|
|
Appreciate
0
|
| 05-05-2014, 12:21 PM | #36 | ||
|
Prince of Zamunda
9
Rep 310
Posts |
Quote:
Front Top hat allen wrench is a 6, bolt is a pass-through 16mm I believe Sway bar screw was a torx 30 and nut was a pass-through 16mm Rear Sway bar same as front Shock bolt is 18mm as mentioned above and etorx is 14 Control arm bolt and nut are both 21 When re-installing rear, you have to install control arm bolt first because the shock bolt pinches the end of the arm. Quote:
I can't describe how thoroughly impressed I am with how much the handling changed after just these springs. It's a wonder how lowering the center of gravity and a bit stiffer springs can do. Is there still body roll? Yes. But you can now take aggressive corners and the ride is still comfortable. |
||
|
Appreciate
0
|
| 05-05-2014, 12:40 PM | #37 | |
|
Captain
252
Rep 674
Posts |
Quote:
|
|
|
Appreciate
0
|
| 05-14-2014, 05:02 PM | #38 |
|
Private
 7
Rep 74
Posts |
Hey everyone,
I am about to get these installed on my F30 335i Sport. As much as I would love to try and install them myself, I know I would jack everything up lol. Im not mechanically inclined. I have a quote from a shop that wants 580 for install and another 90 for the alignment. I have no idea what a good price would be for installation. Can anyone give me some ballparks? Thanks! |
|
Appreciate
0
|
| 05-14-2014, 08:19 PM | #39 | |
|
Lieutenant Colonel
3185
Rep 1,902
Posts |
Quote:
__________________
 2022 G80 M3 Comp M xDrive |
|
|
Appreciate
0
|
| 05-14-2014, 08:22 PM | #40 | |
|
Private
7
Rep 74
Posts |
Quote:
|
|
|
Appreciate
0
|
| 05-14-2014, 08:31 PM | #41 | |
|
Lieutenant Colonel
3185
Rep 1,902
Posts |
Quote:
__________________
2022 G80 M3 Comp M xDrive |
|
|
Appreciate
0
|
| 05-14-2014, 08:40 PM | #43 | |
|
Lieutenant Colonel
3185
Rep 1,902
Posts |
Quote:
__________________
2022 G80 M3 Comp M xDrive |
|
|
Appreciate
0
|
| 05-14-2014, 09:25 PM | #44 | ||
|
Prince of Zamunda
9
Rep 310
Posts |
Quote:
Quote:
 |
||
|
Appreciate
0
|
Post Reply |
| Bookmarks |
|
|


